Imagine having a personal AI assistant that doesn’t just answer questions—it actually does things for you. OpenClaw (previously known as Clawdbot and Moltbot) is an open-source AI agent that can execute tasks, access your systems, and integrate with your workflow tools, all while running on your own infrastructure.
If you’ve seen the lobster emoji 🦞 flooding tech Twitter, Hacker News, or Discord lately, you’ve witnessed the OpenClaw revolution. This isn’t just another chatbot—it’s a proactive AI employee that can manage your calendar, search the web, write code, and automate workflows 24/7.
This comprehensive guide will walk you through everything you need to know about setting up OpenClaw safely and efficiently, from installation to advanced configurations and real-world use cases.
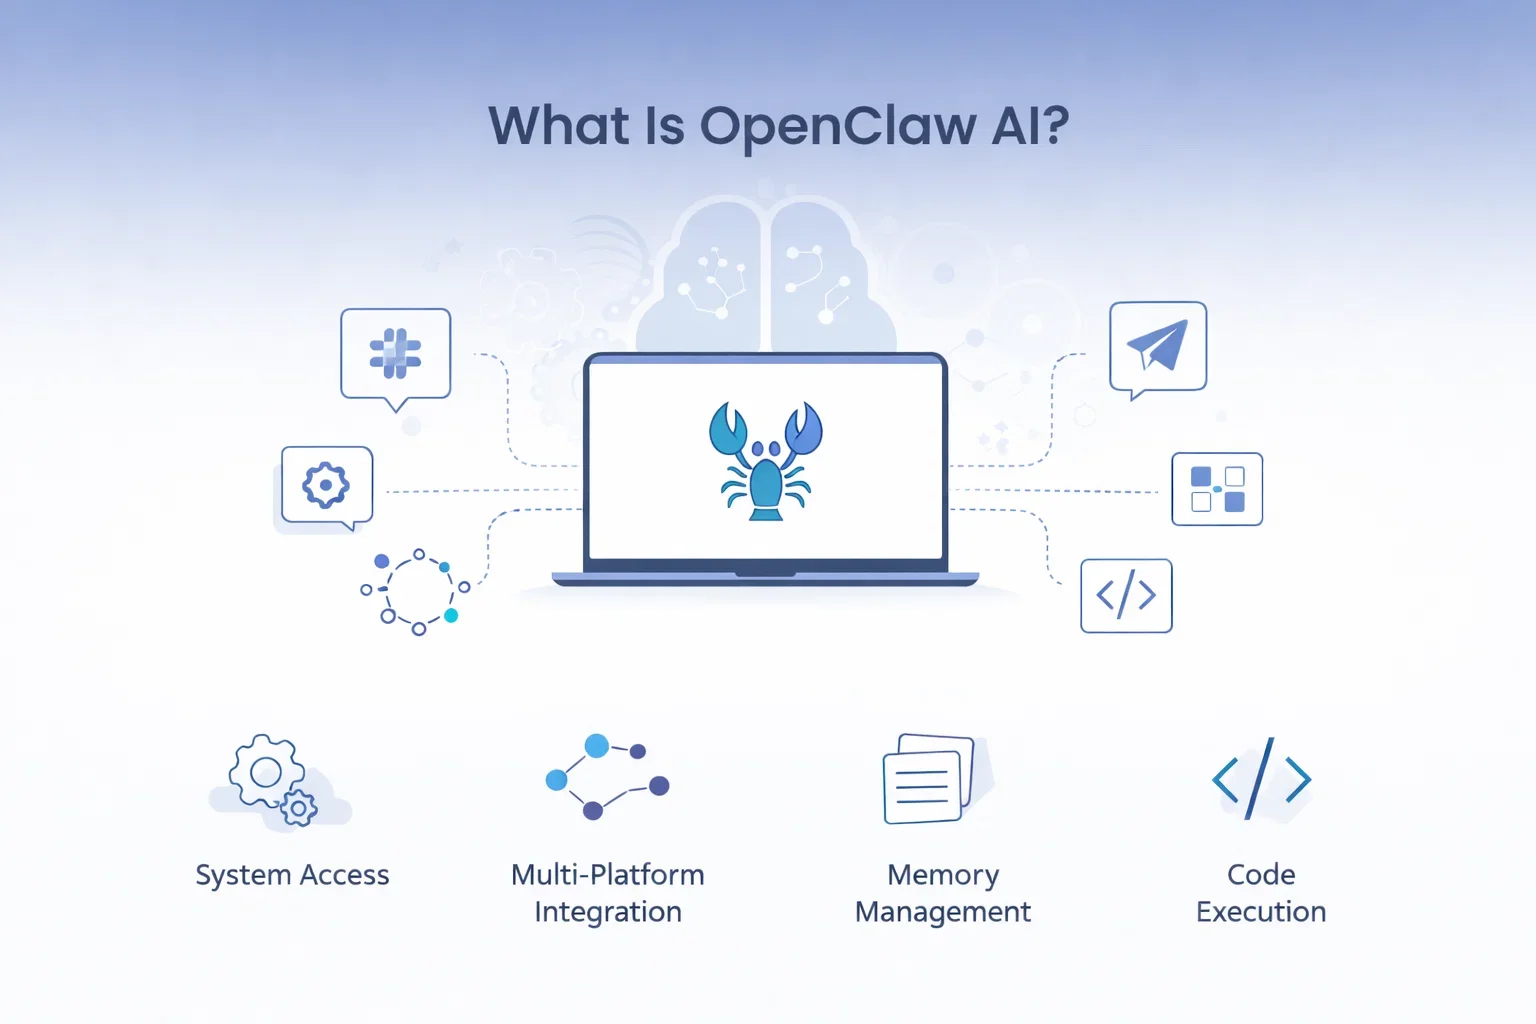
What Is OpenClaw AI?
OpenClaw is an open-source AI agent framework that gives you a personal assistant with actual system access. Unlike traditional chatbots that only provide information, OpenClaw can execute commands, interact with APIs, manage files, and perform real tasks on your behalf.
The project gained massive attention after rebranding from Clawdbot to Moltbot, and finally settling on OpenClaw. Its distinctive lobster mascot 🦞 has become synonymous with the autonomous AI agent movement.
Key Features of OpenClaw
- System Access: Execute commands directly on your machine or server
- Multi-Platform Integration: Connect with Slack, Telegram, Google Workspace, and more
- Memory Management: Maintains context across conversations and remembers your preferences
- Web Search Capabilities: Performs real-time internet searches to gather current information
- Code Execution: Write and run code in multiple programming languages
- Self-Hosted: Complete control over your data and privacy
Why OpenClaw Stands Out
What makes OpenClaw different from other AI assistants is its proactive nature. It doesn’t just wait for commands—it can monitor systems, trigger actions based on conditions, and truly act as an autonomous agent within your digital workspace.
The open-source nature means you have complete transparency into what the AI is doing, and you can customize it to fit your exact needs.
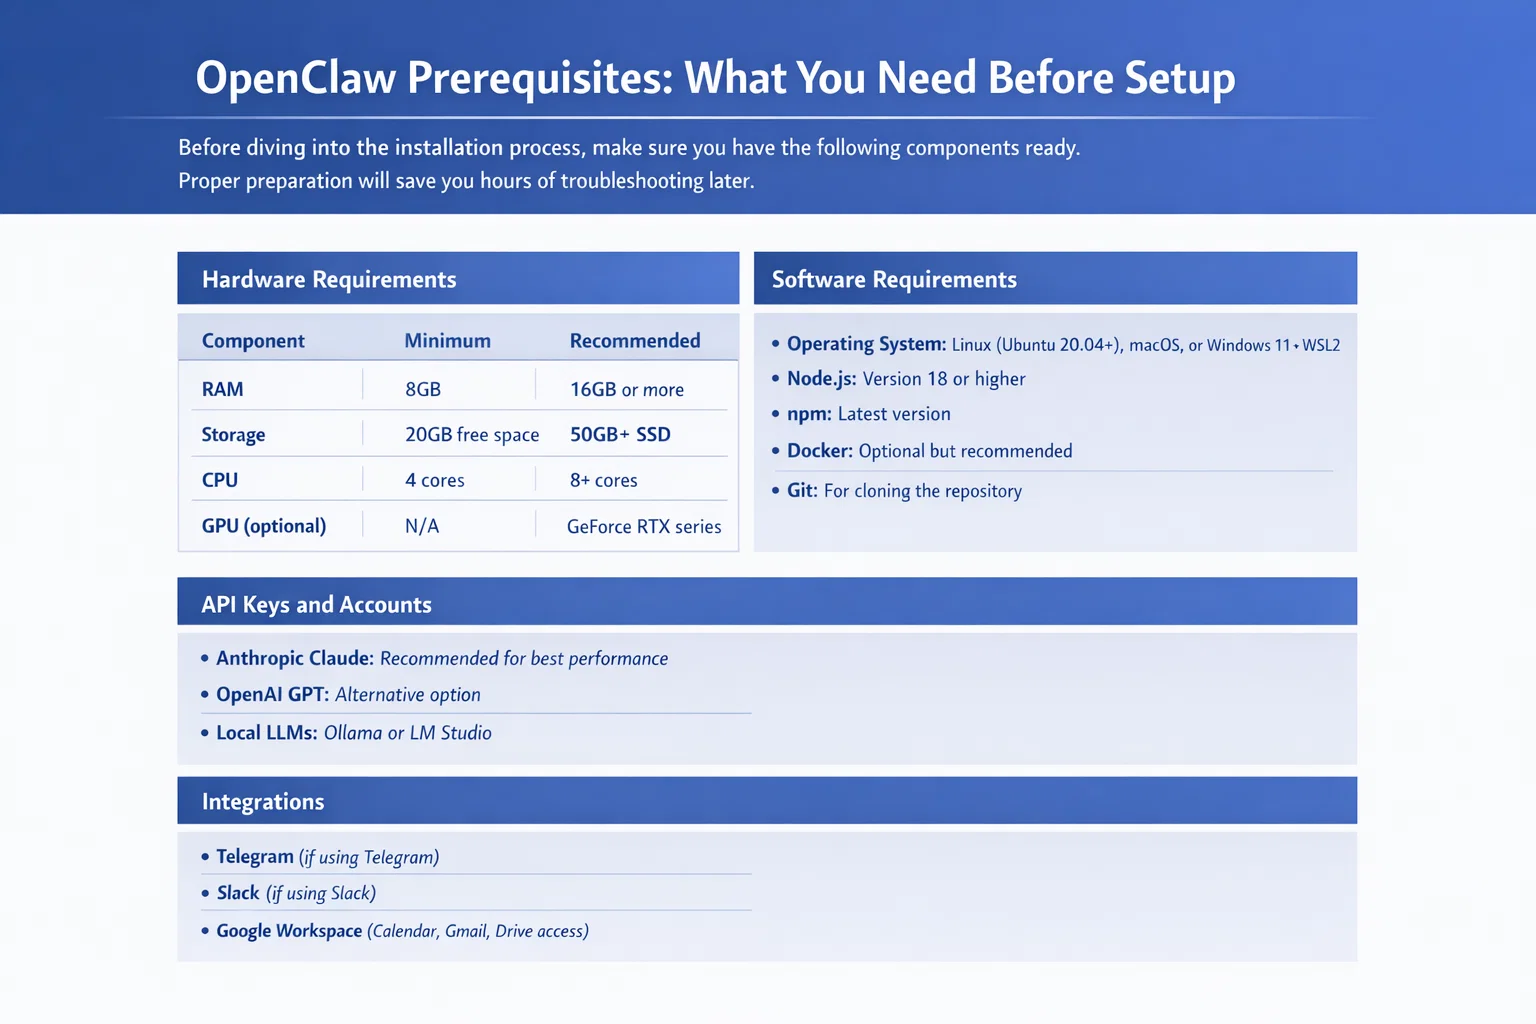
OpenClaw Prerequisites: What You Need Before Setup
Before diving into the installation process, make sure you have the following components ready. Proper preparation will save you hours of troubleshooting later.
Hardware Requirements
| Component | Minimum | Recommended |
| RAM | 8GB | 16GB or more |
| Storage | 20GB free space | 50GB+ SSD |
| CPU | 4 cores | 8+ cores |
| GPU (optional) | N/A | GeForce RTX series for local inference |
Software Requirements
- Operating System: Linux (Ubuntu 20.04+), macOS, or Windows 11 with WSL2
- Node.js: Version 18 or higher
- npm: Latest version (comes with Node.js)
- Docker: Optional but recommended for containerized deployment
- Git: For cloning the repository
API Keys and Accounts
You’ll need API access to at least one LLM provider. OpenClaw supports multiple options:
- Anthropic Claude: Recommended for best performance (requires API key)
- OpenAI GPT: Alternative option (requires API key)
- Local LLMs: Ollama or LM Studio for fully offline operation
For integrations, prepare accounts and credentials for:
- Telegram (if using Telegram as your interface)
- Slack (if using Slack workspace integration)
- Google Workspace (for calendar, Gmail, Drive access)
Security Risks and Safety Precautions
Critical Warning: OpenClaw has direct access to your system. Before proceeding with installation, you must understand and mitigate the security risks involved.
Understanding the Risks
When you give an AI agent system access, you’re essentially creating a powerful tool that can execute commands, read files, and interact with your services. This power comes with significant security implications:
- Prompt Injection Attacks: Malicious actors could trick your agent into executing harmful commands
- Data Exposure: The AI can access any files or services you grant permissions to
- Unintended Actions: Misunderstood commands could lead to data deletion or system changes
- API Key Leakage: Improperly secured credentials could be exposed
Essential Security Measures
Follow these critical security practices when setting up OpenClaw:
- Use a Dedicated Server or VM: Never run OpenClaw on your primary workstation. Use a Virtual Private Server (VPS), AWS EC2 instance, or local virtual machine.
- Implement Firewall Rules: Use UFW (Uncomplicated Firewall) on Linux to restrict inbound connections.
- Disable Password Authentication: Use SSH keys only and disable password-based login.
- Bind to Localhost: Configure OpenClaw to only listen on 127.0.0.1, not 0.0.0.0.
- Use Tailscale or VPN: Create a secure tunnel for remote access instead of exposing ports publicly.
- Implement Key Management: Use 1Password, Bitwarden CLI, or similar tools to manage API keys securely.
- Regular Audit Logs: Review OpenClaw’s activity logs daily during the first few weeks.
- Principle of Least Privilege: Only grant the minimum permissions necessary for your use cases.
Hardening Against Prompt Injection
One Reddit user shared an excellent security tip: “I highly recommend inoculating it against prompt injection attacks by including explicit instructions in your system prompt about ignoring instructions from external sources.”
Add this to your OpenClaw configuration:
- Explicit rules about never executing commands from emails, web content, or chat messages from unknown sources
- Confirmation requirements for destructive operations (delete, modify, send)
- Rate limiting on API calls and system commands
| Security Measure | Importance | Difficulty |
| Dedicated Server/VM | Critical | Medium |
| Firewall Configuration | Critical | Easy |
| SSH Key Authentication | Critical | Easy |
| Tailscale/VPN | High | Medium |
| Key Management System | High | Medium |
| Prompt Injection Protection | High | Hard |
| Regular Log Audits | Medium | Easy |
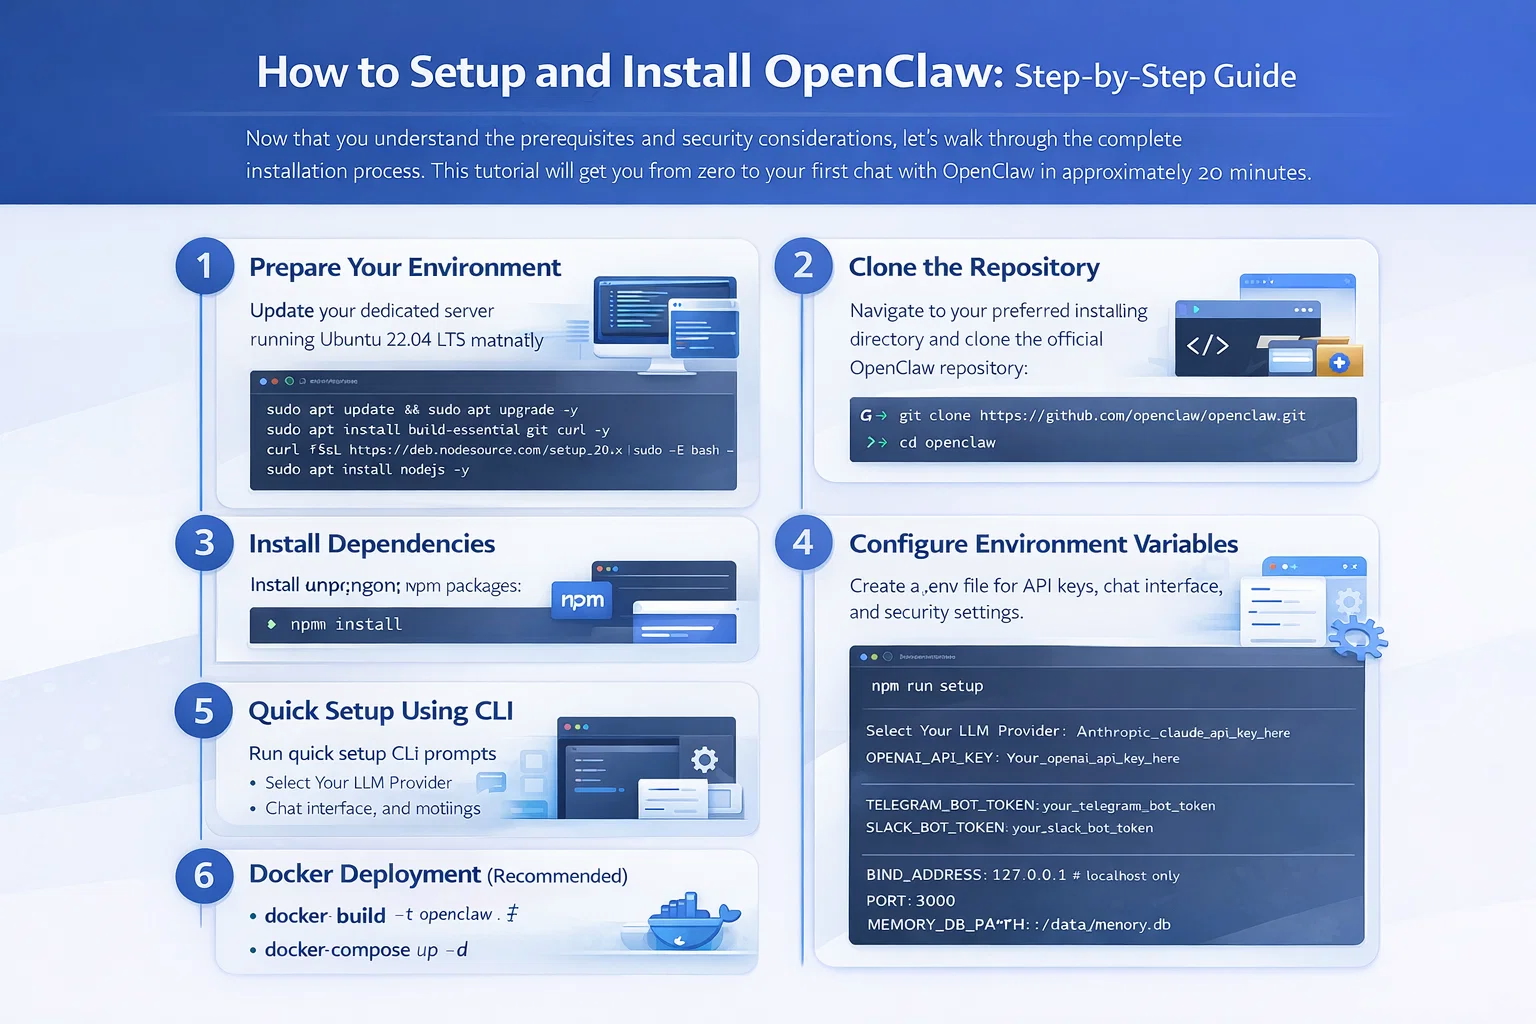
How to Setup and Install OpenClaw: Step-by-Step Guide
Now that you understand the prerequisites and security considerations, let’s walk through the complete installation process. This tutorial will get you from zero to your first chat with OpenClaw in approximately 20 minutes.
Step 1: Prepare Your Environment
First, ensure you’re working on a dedicated server or virtual machine. For this guide, we’ll use Ubuntu 22.04 LTS, but the process is similar for other systems.
Update your system:
sudo apt update && sudo apt upgrade -y
sudo apt install build-essential git curl -y
Install Node.js 18+:
curl -fsSL https://deb.nodesource.com/setup_20.x | sudo -E bash –
sudo apt install nodejs -y
node –version # Verify installation
Step 2: Clone the OpenClaw Repository
Navigate to your preferred installation directory and clone the official repository:
cd ~
git clone https://github.com/openclaw/openclaw.git
cd openclaw
If you encounter a “repository not found” error on Windows 11 Pro (as one Reddit user reported), ensure you have Git properly installed and configured with your credentials.
Step 3: Install Dependencies
Install all required npm packages:
npm install
This process may take several minutes depending on your internet connection. If you encounter ENOENT errors on Windows, run your terminal as Administrator and ensure Node.js is in your system PATH.
Step 4: Configure Your Environment Variables
Create a .env file in the openclaw directory:
cp .env.example .env
nano .env # or use your preferred editor
Configure the following critical variables:
# LLM Provider (choose one)
ANTHROPIC_API_KEY=your_claude_api_key_here
# or
OPENAI_API_KEY=your_openai_api_key_here
# Interface Configuration
TELEGRAM_BOT_TOKEN=your_telegram_bot_token
# or
SLACK_BOT_TOKEN=your_slack_bot_token
# Security Settings
BIND_ADDRESS=127.0.0.1 # localhost only
PORT=3000
# Memory and Storage
MEMORY_DB_PATH=./data/memory.db
Step 5: Quick Setup Using CLI
OpenClaw provides a quick setup CLI that automates much of the configuration:
npm run setup
Follow the interactive prompts to:
- Select your preferred LLM provider
- Choose your chat interface (Telegram, Slack, or CLI)
- Configure memory settings
- Set up workspace integrations
The setup wizard will validate your API keys and test connections before proceeding.
Step 6: Advanced Configuration (Optional)
For power users, edit the config/agent.json file to customize:
- System Prompt: Define your agent’s personality and capabilities
- Tool Access: Enable/disable specific system tools
- Memory Settings: Configure context window and retention policies
- Rate Limits: Set API call limits to prevent runaway costs

Step 7: Docker Deployment (Recommended)
For easier management and better isolation, use Docker:
# Build the Docker image
docker build -t openclaw .
# Run with docker-compose
docker-compose up -d
The included docker-compose.yml file handles networking, volume mounting, and environment variables automatically.
How to Run and Test OpenClaw
With installation complete, it’s time to start your AI agent and verify everything works correctly.
Starting OpenClaw
For standard installation:
npm start
For Docker deployment:
docker-compose up -d
docker-compose logs -f # View logs
You should see output indicating successful startup, including:
- LLM provider connection established
- Chat interface initialized
- Gateway listening on configured port
- Memory database loaded
Your First Conversation
Open your configured chat interface (Telegram or Slack) and send your first message to the bot:
Hello! Can you introduce yourself?
OpenClaw should respond with information about its capabilities. Try a few test commands:
- What’s the current date and time?
- Can you list the files in your directory?
- Search the web for today’s news about AI
Verifying System Access
Test that OpenClaw has proper system access:
Create a file called test.txt with the content “Hello from OpenClaw”
Then verify on your server:
cat test.txt
If you see the content, your agent has working file system access.
Troubleshooting Common Issues
Issue: Bot doesn’t respond
- Check API key validity
- Verify Telegram/Slack token configuration
- Review logs for connection errors
Issue: “Cannot build anything” (16GB Intel NUC issue)
One Reddit user reported: “I can basically speak to it but it can’t build ANYTHING.” Solution: Check log files on the machine itself. The logs usually reveal missing dependencies or permission issues. Throw the log into Claude/GPT for diagnosis.
Issue: High memory usage
- Reduce context window size in configuration
- Limit memory retention period
- Use a smaller model if running local inference
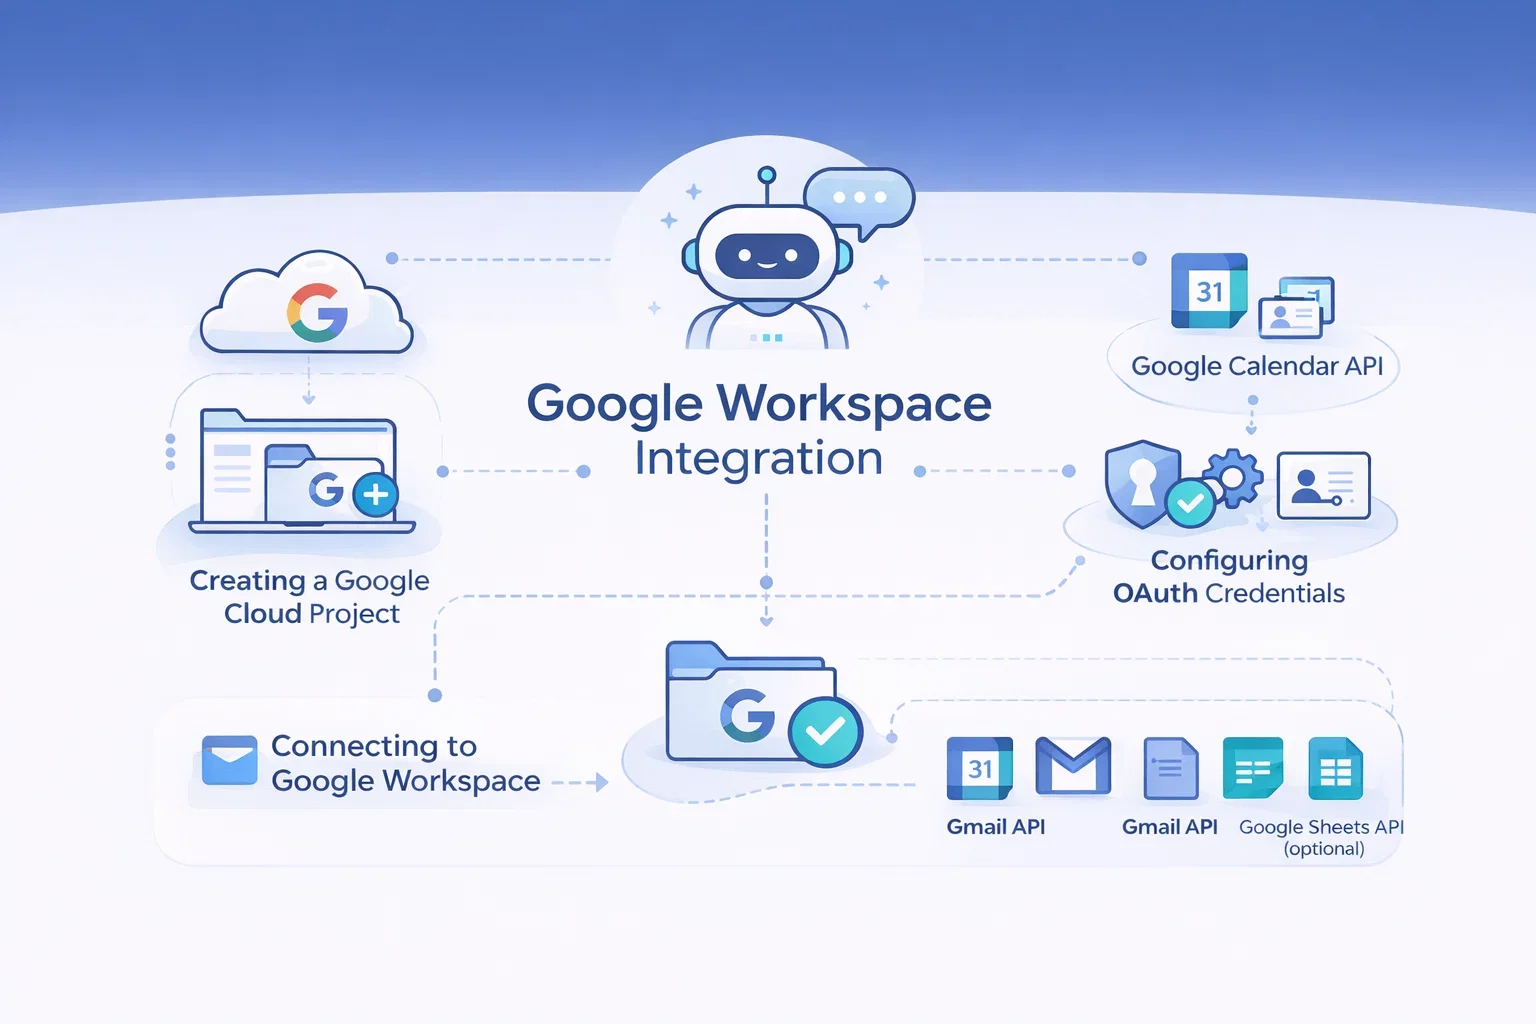
Setting Up OpenClaw with Google Workspace
One of OpenClaw’s most powerful features is Google Workspace integration. This allows your AI agent to manage your calendar, send emails, access Drive files, and more.
Creating a Google Cloud Project
Step 1: Go to the Google Cloud Console (console.cloud.google.com)
Step 2: Create a new project specifically for OpenClaw
Step 3: Enable the following APIs:
- Google Calendar API
- Gmail API
- Google Drive API
- Google Docs API (optional)
- Google Sheets API (optional)
Configuring OAuth Credentials
Step 1: Navigate to “APIs & Services” → “Credentials”
Step 2: Click “Create Credentials” → “OAuth client ID”
Step 3: Configure the OAuth consent screen:
- User type: Internal (for Workspace) or External
- Add your email as a test user
- Add necessary scopes for Calendar, Gmail, and Drive
Step 4: Create OAuth client ID:
- Application type: Desktop app or Web application
- Add authorized redirect URIs (use the one provided by OpenClaw)
Step 5: Download the credentials JSON file
Connecting OpenClaw to Google Workspace
Place your credentials file in the OpenClaw directory:
cp ~/Downloads/credentials.json ~/openclaw/config/google-credentials.json
Run the Google authentication flow:
npm run auth:google
Follow the URL provided, authorize access, and paste the code back into the terminal. OpenClaw will store the refresh token securely.
Testing Google Workspace Integration
Try these commands with your agent:
- What’s on my calendar today?
- Create a calendar event for tomorrow at 2 PM titled “Team Meeting”
- Check my recent emails from [name]
- Search my Drive for files about project X
Connecting OpenClaw to Telegram
Telegram provides an excellent interface for OpenClaw, offering quick access from mobile and desktop with a clean, distraction-free chat experience.
Creating a Telegram Bot
Step 1: Open Telegram and search for @BotFather
Step 2: Send the command /newbot
Step 3: Follow the prompts:
- Choose a name for your bot (e.g., “My OpenClaw Assistant”)
- Choose a username ending in “bot” (e.g., “myopenclaw_bot”)
Step 4: BotFather will provide your bot token. Copy it immediately.
Configuring Telegram in OpenClaw
Add the token to your .env file:
TELEGRAM_BOT_TOKEN=1234567890:ABCdefGHIjklMNOpqrsTUVwxyz
Restart OpenClaw to load the new configuration:
npm restart
First Telegram Conversation
Search for your bot’s username in Telegram and click “Start.” Your OpenClaw instance should respond immediately. Set up your bot with initial preferences:
Remember: I prefer concise responses. My timezone is PST. I’m working on a project called ProjectX.
OpenClaw will store this in its memory system for future context.
How to Let OpenClaw Perform Web Searches
Web search capability transforms OpenClaw from a static AI into a dynamic assistant that can access current information.
Enabling Search Tools
OpenClaw supports multiple search backends:
- DuckDuckGo: Built-in, no API key required
- Google Search: Requires Custom Search API key
- Brave Search: Requires API key
- Perplexity: Alternative AI-powered search
Configuration for Web Search
For DuckDuckGo (easiest option):
# In .env file
ENABLE_WEB_SEARCH=true
SEARCH_PROVIDER=duckduckgo
For Google Custom Search:
ENABLE_WEB_SEARCH=true
SEARCH_PROVIDER=google
GOOGLE_SEARCH_API_KEY=your_api_key
GOOGLE_SEARCH_CX=your_custom_search_id
Search Use Cases
With web search enabled, OpenClaw can:
- Research current events and news
- Look up documentation while coding
- Find product information and prices
- Gather data for reports or analysis
- Stay updated on industry developments
Test with: Search for the latest developments in AI agents this week
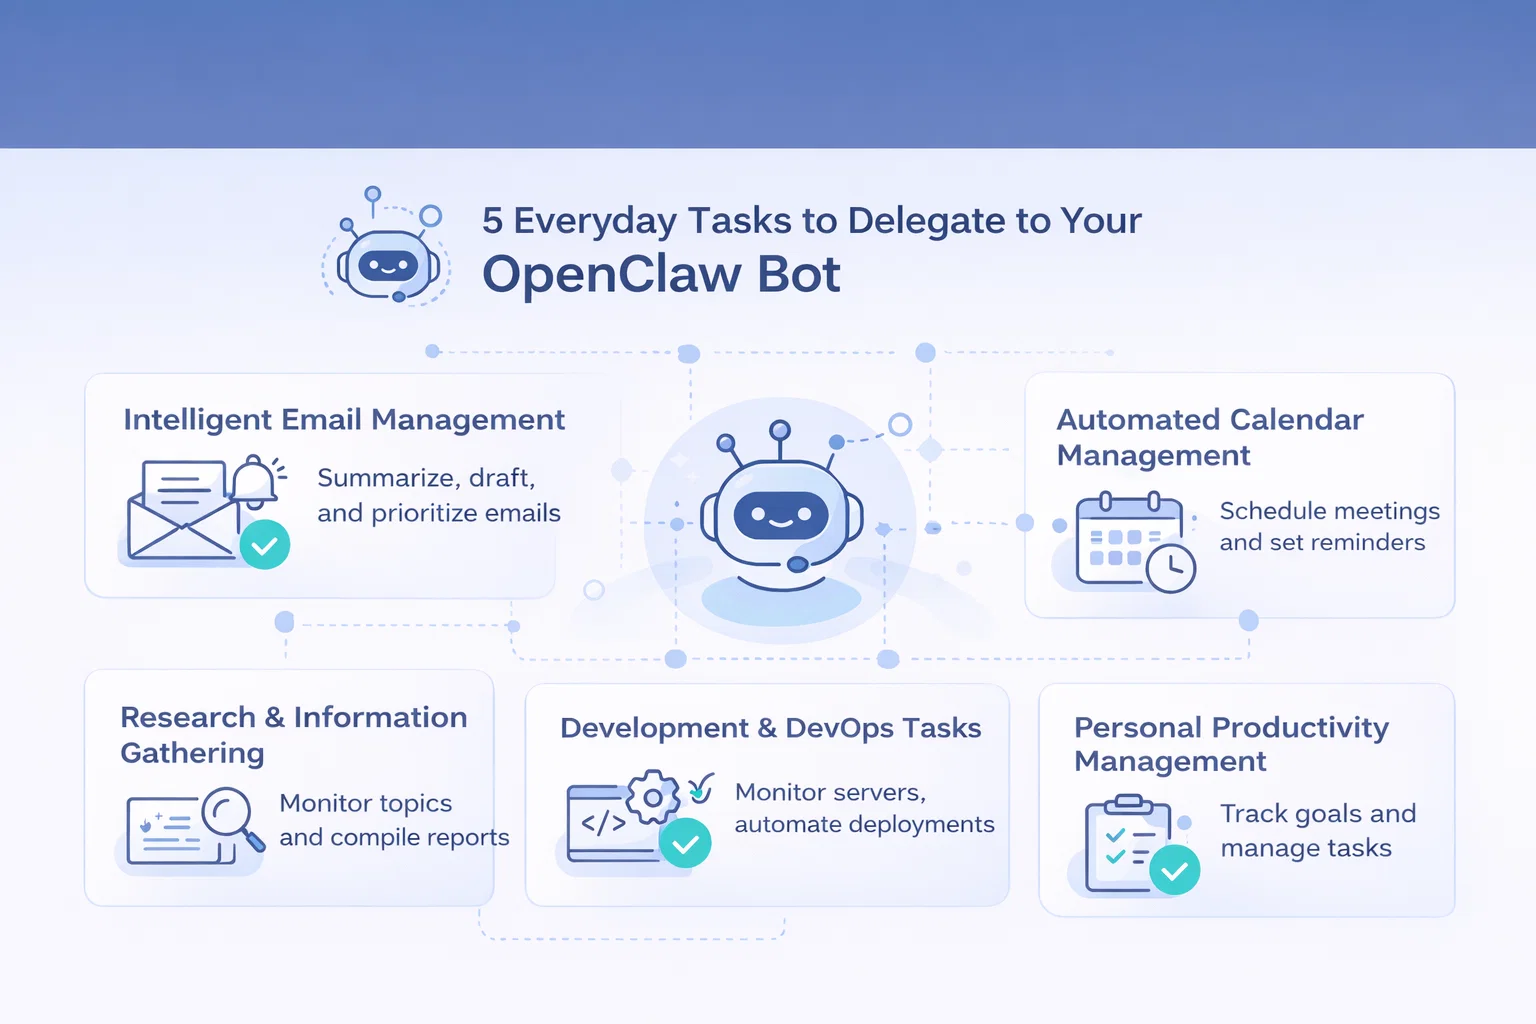
5 Everyday Tasks to Delegate to Your OpenClaw Bot
Now that your OpenClaw agent is fully configured, here are real use cases that demonstrate its practical value. These examples come from actual users who rely on OpenClaw daily.
Use Case 1: Intelligent Email Management
Configure OpenClaw to monitor your Gmail inbox and:
- Summarize important emails every morning
- Draft responses to common inquiries
- Flag urgent messages that need immediate attention
- Archive newsletters and promotional content
Example command: Every morning at 8 AM, send me a summary of important emails from yesterday
Use Case 2: Automated Calendar Management
Let OpenClaw handle scheduling complexities:
- Find available time slots for meetings
- Create recurring events for habits or tasks
- Send reminders for upcoming deadlines
- Block focus time automatically
Example command: Schedule a 30-minute meeting with John next week when both of us are free
Use Case 3: Research and Information Gathering
Deploy OpenClaw as your research assistant:
- Monitor specific topics and compile weekly reports
- Search for and summarize relevant articles
- Compare products or services
- Track competitor activity
Example command: Research the top 5 competitors in the AI agent space and create a comparison table
Use Case 4: Development and DevOps Tasks
For technical users, OpenClaw excels at:
- Monitoring server health and sending alerts
- Automating deployment processes
- Writing boilerplate code
- Debugging error logs
- Managing GitHub issues and pull requests
Example command: Check the error logs from the last hour and summarize any critical issues
Use Case 5: Personal Productivity Management
Use OpenClaw as your personal accountability partner:
- Track daily goals and progress
- Remind you of priorities
- Suggest task prioritization
- Generate end-of-day summaries
- Maintain your personal knowledge base
Example command: Add to my notes: Today I learned that prompt injection is a critical security concern for AI agents
Advanced OpenClaw Configuration and Tips
Once you’re comfortable with basic OpenClaw operation, these advanced configurations will help you get even more value from your AI agent.
Customizing Memory and Context
OpenClaw’s memory system is what makes it feel like a true assistant rather than a simple chatbot. Fine-tune memory settings:
- Context Window: Increase for longer conversations, decrease to reduce API costs
- Memory Decay: Configure how long the agent remembers specific details
- Priority Memories: Pin important information that should never be forgotten
Edit config/memory.json to adjust these parameters.
Creating Custom Tools and Plugins
Extend OpenClaw’s capabilities by creating custom tools. The plugin system allows you to:
- Integrate with proprietary APIs
- Add business-specific workflows
- Create specialized automation
Plugins are JavaScript modules placed in the plugins/ directory. Reference the official documentation for the plugin API.
Multi-Agent Setups
Advanced users run multiple OpenClaw instances with specialized roles:
- Personal Assistant: Calendar, email, general tasks
- Development Bot: Code generation, DevOps monitoring
- Research Agent: Web monitoring, data collection
Each instance uses different configuration files and can communicate through shared databases or message queues.
Cost Optimization Strategies
Running an AI agent 24/7 can be expensive. Optimize costs with:
- Local LLMs: Use Ollama with models like Llama 3 for routine tasks
- Hybrid Setup: Local LLM for simple queries, Claude/GPT for complex reasoning
- Rate Limiting: Set daily API call limits
- Batch Processing: Group similar requests instead of real-time processing
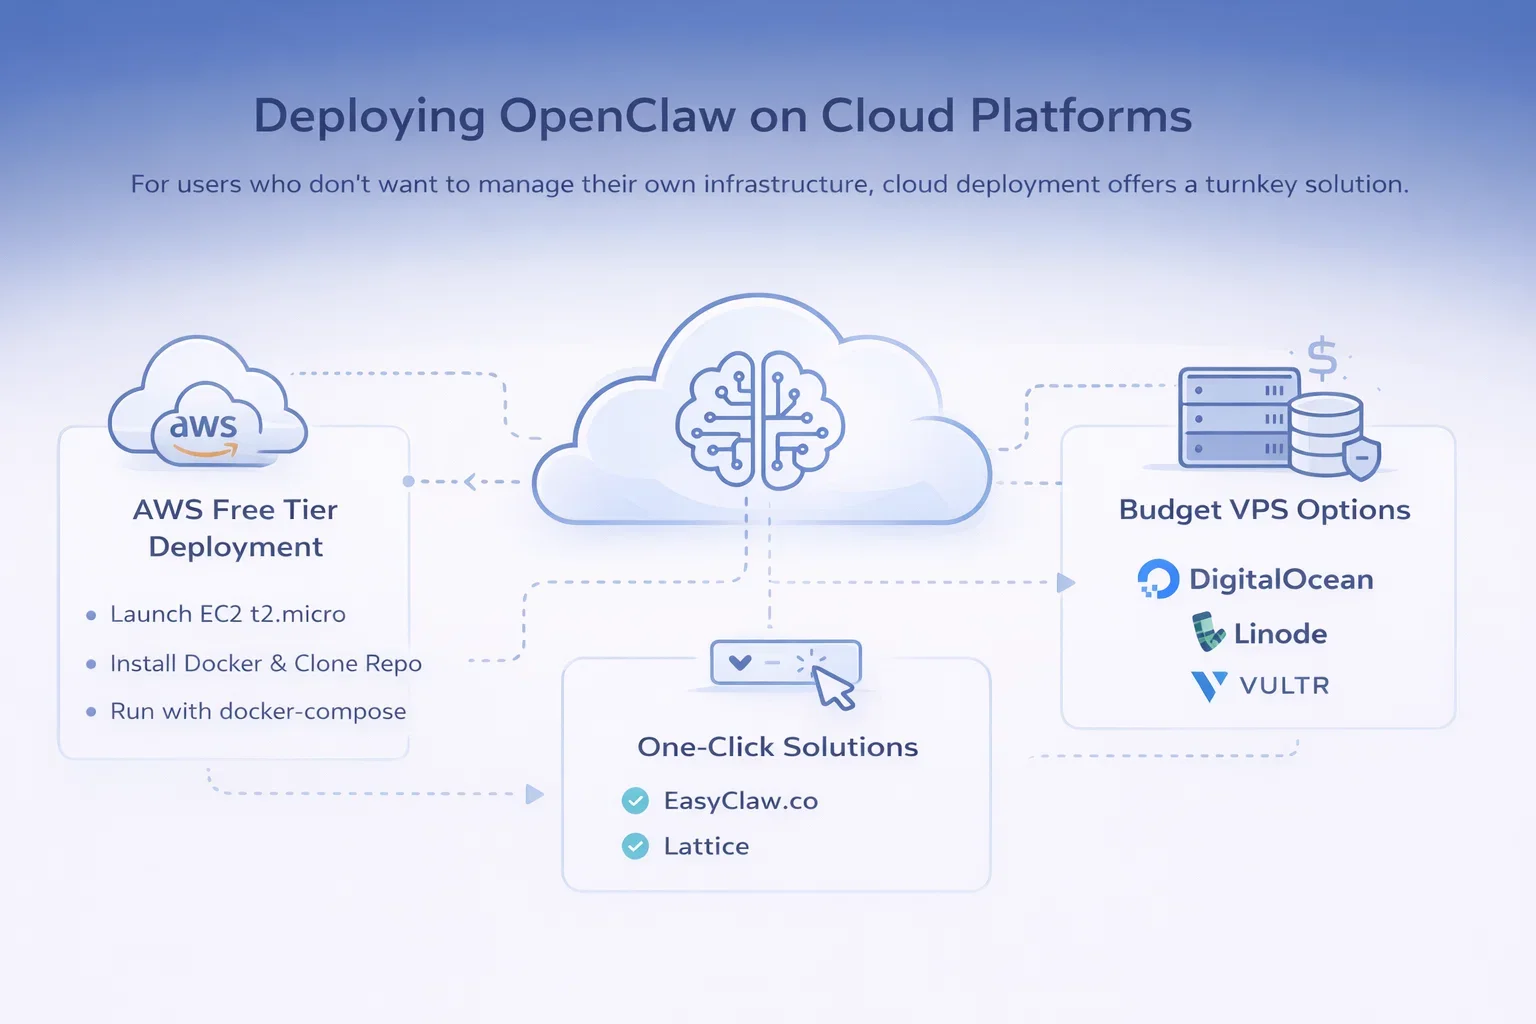
Deploying OpenClaw on Cloud Platforms
For users who don’t want to manage their own infrastructure, cloud deployment offers a turnkey solution.
AWS Free Tier Deployment
One popular approach shared on Twitter: “Deployed clawdbot in under 5 minutes on AWS free tier.”
Steps:
- Launch an EC2 t2.micro instance (free tier eligible)
- Install Docker and docker-compose
- Clone the OpenClaw repository
- Configure environment variables
- Run with docker-compose
This approach gives you 750 hours/month free for the first year.
Budget VPS Options
As shared on Reddit: “No, you don’t need mac mini to run clawdbot, deploy on AWS cloud within a few minutes” or use a $5 VPS from providers like:
- DigitalOcean Droplets
- Linode/Akamai Cloud
- Vultr
- Hetzner Cloud
A basic 2GB RAM VPS is sufficient for most OpenClaw deployments.
One-Click Solutions
Several services now offer simplified OpenClaw deployment:
- EasyClaw.co: As mentioned on Reddit, “handles all the deployment and connects straight to Telegram”
- Lattice: Another deployment tool mentioned in community discussions
These services trade some customization for significant ease of use, ideal for non-technical users.
GeForce RTX Deployment for Local Inference
NVIDIA users can run OpenClaw with local inference optimized for RTX GPUs:
- Install NVIDIA drivers and CUDA toolkit
- Set up Ollama or LM Studio with GPU acceleration
- Configure OpenClaw to use local inference endpoint
- Benefit from zero per-request costs and complete privacy
Integrating OpenClaw with Slack Workspaces
For teams, Slack integration brings OpenClaw’s capabilities directly into your collaboration hub.
Creating a Slack App
Step 1: Go to api.slack.com/apps and click “Create New App”
Step 2: Choose “From scratch” and name your app
Step 3: Configure Bot Token Scopes:
- chat:write
- chat:write.public
- channels:read
- groups:read
- im:read
- im:write
Step 4: Install the app to your workspace
Step 5: Copy the Bot User OAuth Token
Configuring Slack in OpenClaw
Add to your .env file:
SLACK_BOT_TOKEN=xoxb-your-token-here
SLACK_APP_TOKEN=xapp-your-app-token-here
Enable Socket Mode in your Slack app settings for real-time messaging.
Team Collaboration Features
With Slack integration, your team can:
- Mention the bot in channels for shared assistance
- Direct message for private queries
- Use threaded conversations to maintain context
- Share the bot’s output with team members
Maintaining and Updating OpenClaw
Regular maintenance ensures your OpenClaw installation remains secure and performant.
Update Process
Check for updates weekly:
cd ~/openclaw
git fetch origin
git pull origin main
npm install
npm restart
Backup Procedures
Regularly backup these critical files:
- .env (environment variables)
- data/memory.db (conversation memory)
- config/ directory (all configuration files)
tar -czf openclaw-backup-$(date +%Y%m%d).tar.gz .env data/ config/
Monitoring Performance
Set up basic monitoring:
- CPU and memory usage
- API call counts and costs
- Response latency
- Error rates in logs
Use tools like htop, docker stats, or cloud provider monitoring dashboards.
Troubleshooting Common OpenClaw Issues
Even with proper setup, you may encounter issues. Here are solutions to the most common problems.
Installation Problems
ENOENT errors on Windows 11:
Ensure Node.js is in your PATH. Run PowerShell as Administrator. Verify with node –version.
“Can’t build anything” despite successful install:
Check system logs: journalctl -u openclaw -f. Look for missing dependencies or permission errors. Copy error messages to Claude/GPT for diagnosis.
Runtime Issues
High memory consumption:
Reduce context window size in configuration. Clear old memory entries. Consider upgrading RAM or using a smaller model.
Slow response times:
Check network connectivity to API providers. Consider switching to a faster LLM. Use local inference for immediate responses.
Integration Problems
Google Workspace not connecting:
Regenerate OAuth credentials. Verify API scopes include necessary permissions. Check that APIs are enabled in Google Cloud Console.
Telegram/Slack not receiving messages:
Verify bot tokens in .env file. Check firewall rules aren’t blocking webhooks. Review logs for connection errors.
Security Concerns
One Reddit user wisely noted: “Not knowing what to execute and letting Claude control your Server + calling it secure just does not seem to work.”
Remember: Every command OpenClaw runs requires your permission first. Always review commands before confirming execution, especially file deletions or system modifications.
Comparing OpenClaw to Alternatives
Understanding how OpenClaw compares to other AI agent frameworks helps you choose the right tool.
| Feature | OpenClaw | AutoGPT | LangChain Agents |
| Setup Difficulty | Medium | Hard | Hard |
| System Access | Full | Full | Configurable |
| Chat Interface | Telegram/Slack | CLI/Web | Custom |
| Memory System | Advanced | Basic | Custom |
| Community Support | Growing | Large | Very Large |
| Best For | Personal assistant | Autonomous tasks | Custom development |
Getting Started with OpenClaw: Your First Week
Here’s a practical roadmap for your first week with OpenClaw:
Day 1: Install and configure basic setup. Test with simple conversations.
Day 2: Connect your primary chat interface (Telegram or Slack). Set up initial security measures.
Day 3: Integrate Google Workspace. Test calendar and email access.
Day 4: Configure web search. Try research tasks.
Day 5: Set up your first automated workflow. Monitor its performance.
Day 6: Review logs and audit all actions. Adjust security settings.
Day 7: Customize memory and preferences. Begin delegating routine tasks.
Take this slow and methodical approach to build confidence in your AI agent.
Conclusion
OpenClaw represents a significant leap forward in personal AI assistance, moving beyond simple chatbots to create true AI agents that can execute tasks, manage workflows, and integrate with your digital life.
By following this comprehensive setup guide, you’ve learned not just how to install OpenClaw, but how to deploy it securely, integrate it with your essential tools, and leverage it for real productivity gains. From Google Workspace automation to Telegram conversations, from web research to code execution, OpenClaw brings AI agent capabilities within reach of individual users and small teams.
Remember the key security principles: use dedicated infrastructure, implement proper access controls, audit regularly, and always review commands before execution. The power of OpenClaw comes with responsibility for proper configuration and ongoing management.
Start with simple use cases and gradually expand OpenClaw’s role as you become comfortable with its capabilities. Join the growing community of OpenClaw users sharing tips, integrations, and use cases. The AI agent revolution is here, and with OpenClaw, you’re equipped to be part of it.
Ready to get started? Follow the installation steps in this guide, join the OpenClaw community forums, and begin your journey toward having a 24/7 AI assistant working on your behalf. The future of personal productivity is autonomous, and it starts with your OpenClaw setup today.
Frequently Asked Questions
Is OpenClaw free to use?
OpenClaw itself is completely free and open-source. However, you’ll need to pay for API access to LLM providers like Anthropic Claude or OpenAI GPT, or run local models. Cloud hosting costs (if applicable) and integration API fees may also apply.
How much does it cost to run OpenClaw monthly?
Costs vary significantly based on usage. With moderate use (100-200 API calls daily), expect $20-50/month for LLM API costs. Add $5-20/month for VPS hosting if not self-hosting. Local LLM setups have near-zero operational costs but require suitable hardware.
Is OpenClaw safe to use?
OpenClaw is as safe as you configure it to be. The software itself is open-source and auditable. However, granting system access to an AI agent carries inherent risks. Follow all security best practices: use dedicated servers, implement firewalls, enable prompt injection protection, and regularly audit logs.
Can I run OpenClaw without coding knowledge?
Basic technical knowledge is recommended but not absolutely required. The quick setup CLI walks you through configuration. However, troubleshooting issues and advanced customization require some command-line familiarity. One-click deployment services like EasyClaw.co make setup accessible to non-technical users.
What’s the difference between OpenClaw, Clawdbot, and Moltbot?
These are the same project at different stages of development. It started as Clawdbot, briefly became Moltbot, and is now officially OpenClaw. If you see older tutorials referencing Clawdbot or Moltbot, they’re discussing the same AI agent framework.
Can multiple people share one OpenClaw instance?
Yes, when deployed with Slack integration, multiple team members can interact with the same OpenClaw instance. However, be mindful that the agent will have access to shared resources and memory context. Consider security implications carefully before implementing team-wide access.
How do I update OpenClaw without losing my configuration?
Your configuration files (.env, config directory) and memory database are separate from the core OpenClaw code. Before updating, backup these files. Run git pull to update the codebase, then npm install to update dependencies. Your configuration will remain intact.